The automatic installation of a plugin is easy and straightforward. However, you can also install it manually. It will involve manually downloading a plugin, uploading, and activating it.
Make sure you have already downloaded a zip file of the plugin to your desktop.
1. Log in to the WordPress dashboard.
2. From the Dashboard menu, go to Plugins and click on Add New.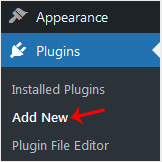
3. Click on Upload Plugin and then on Browse. Choose your plugin's zip file and click Install Now.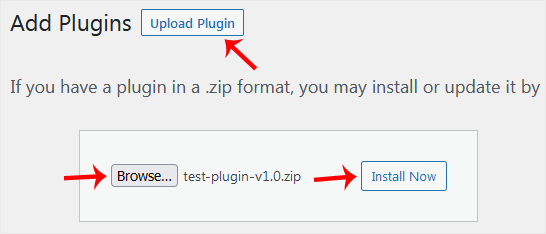
4. Click on Activate Plugin.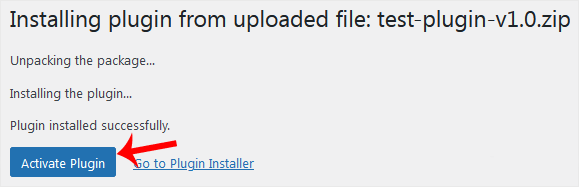
Note: After activating a plugin, a new menu of that plugin is added to the Dashboard menu.
- Home
-
Store
- Browse All
- PROFESSIONAL HOSTING
- Linux VPS
- Windows VPS
- Cloud Storage
- S3 Object Storage
- Server Cloud Linux
- Server Cloud Windows
- Cloud Computer's
- GMail G Suite
- Office 365
- Skype
- Azure
- SharePoint
- OneDrive
- Visio Online
- Exchange Online
- Google ADS & Facebook ADS
- Rack System assistance
- Web System assistance
- SSL Certificates
- XOVI NOW
- VPN
- Register a New Domain
- Transfer Domains to Us
- Announcements
- Knowledgebase
- Network Status
- Contact Us
- Whois
-
More
